Miffy's at a surf camp for the weekend while I'm at a self-imposed "baking" camp. I don't have an oven, so everything is going to be cooked via microwave or hot plates, and I'm substituting a lot of ingredients just because I can't justify buying that much of one ingredient for a one time use.
So hopefully everything will turn out edible and good, but I'm having fun "baking" while watching Friday Night Football (Australian Footy!) on the television and listening to my neighbours' insane music!
FIRST BATCH: chocolate chunk cookies
The preparation:
 |
| Big chunk of dark chocolate. |
 |
| Smaller chunks of dark chocolate. |
 |
| I didn't have maple syrup, molasses or brown sugar, and I needed brown sugar and vanilla extract. Remembering that I once made caramel in a chem lab, I tried to do the same thing with a very different set of materials - it obviously didn't work out, but that's okay. I kind of had fun watching sugar crystals stay crystallised. |
The dough:
 |
| I can normally sort of eye-ball ingredients at home because I use the same containers so frequently, but I was at a total loss here. Hopefully one drinking glass is about one cup... |
 |
| Creamed the butter (decreased the amount of butter because I still cringe at the amount of butter most recipes call for) and sugar together. I used to do this by hand before I had a mixer; I forgot how time consuming it was! |
 |
| About as whipped as it'll get. |
 |
| Added in the wet ingredients. No egg and no vanilla extract. Let's hope these substitutes will be okay. |
 |
| Added in the dry ingredients. |
 |
| I'm not too sure if it's supposed to be this light and whippy, but I'll just keep on mixing and adding the dry stuff. |
 |
| Super light! Maybe I'm so used to not cooking with much butter that I forgot how actual cookie batter looks like, but this was seriously borderline whipped dough. Added a bit of the chocolate chunks just to make some sample cookies. |
Testing the cooking methods:
 |
Cooking method #1: "bake" on a "baking" tray
I didn't have a metal plate, but luckily the top of the milo containers are metal! I suppose I could have used one of the plates I did have, but I wasn't sure how good that china was. |
 |
| First cookie! This is going to be one long process... |
 |
| Halfway there, maybe? |
 |
| Looks like it's browning! |
 |
| Only a bit burnt, due to the chocolate. Not bad. |
 |
Looks good! Pale because two pans can't possibly brown the top, but other than that, not bad!
Tasted pretty good too. |
 |
| Cooking method #2: no "baking" tray. |
 |
| Not bad and faster process! |
 |
Still pale on top, but looks good!
Look at that oozing chocolate, mmm. Tasted great. |
The cooking:
 |
| Rolled all the dough into balls. |
 |
| Flatted onto the pan with a fork. |
|
 |
Flipping over to brown the top as well.
That one chocolate-y cookie was due to damage control. Can't let the chocolate chunks be too exposed on the bottom or top since it'll burn and get gross. Then I also can't re-use the pan without washing it. |
 |
| Ate the damage control cookie. Still tasted fine. |
 |
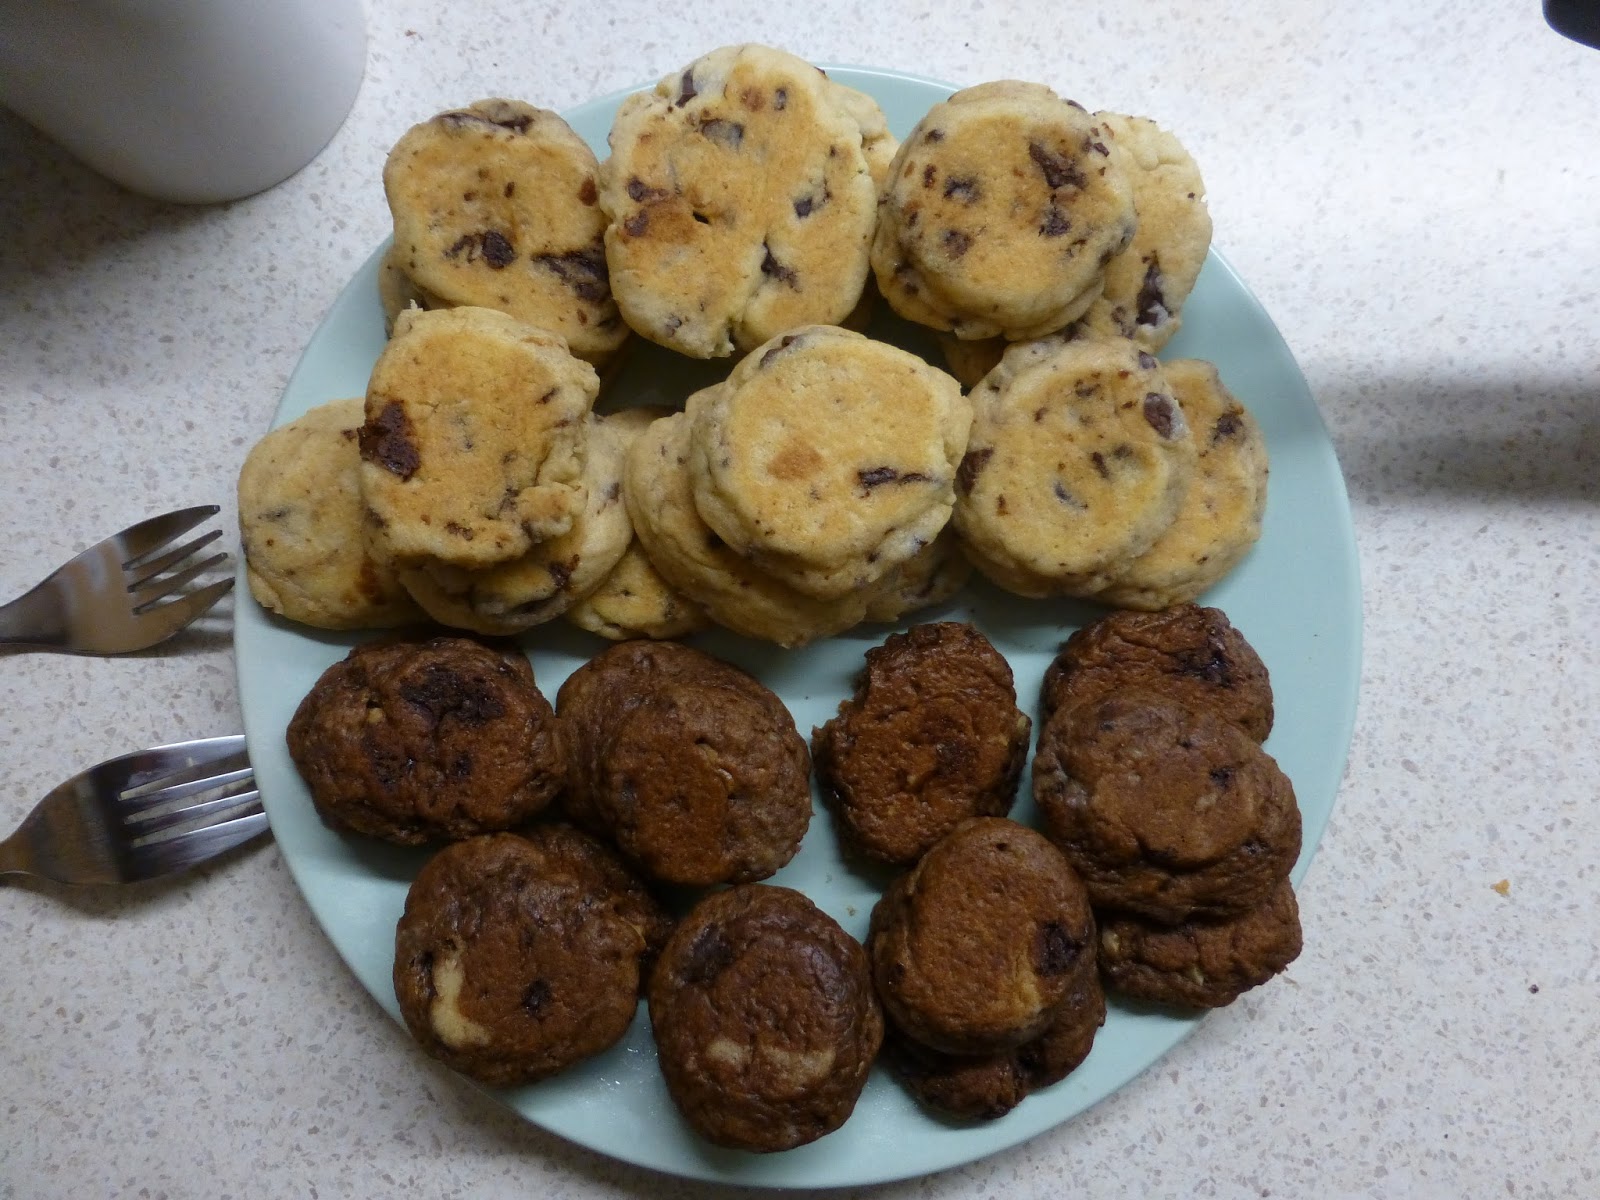
First batch done!
I don't really like how pancake-esque they are though. Next time I'm not going to flatten them on the pan with a fork. |
SECOND BATCH: malted chocolate chocolate chunk walnut cookies
The process:
 |
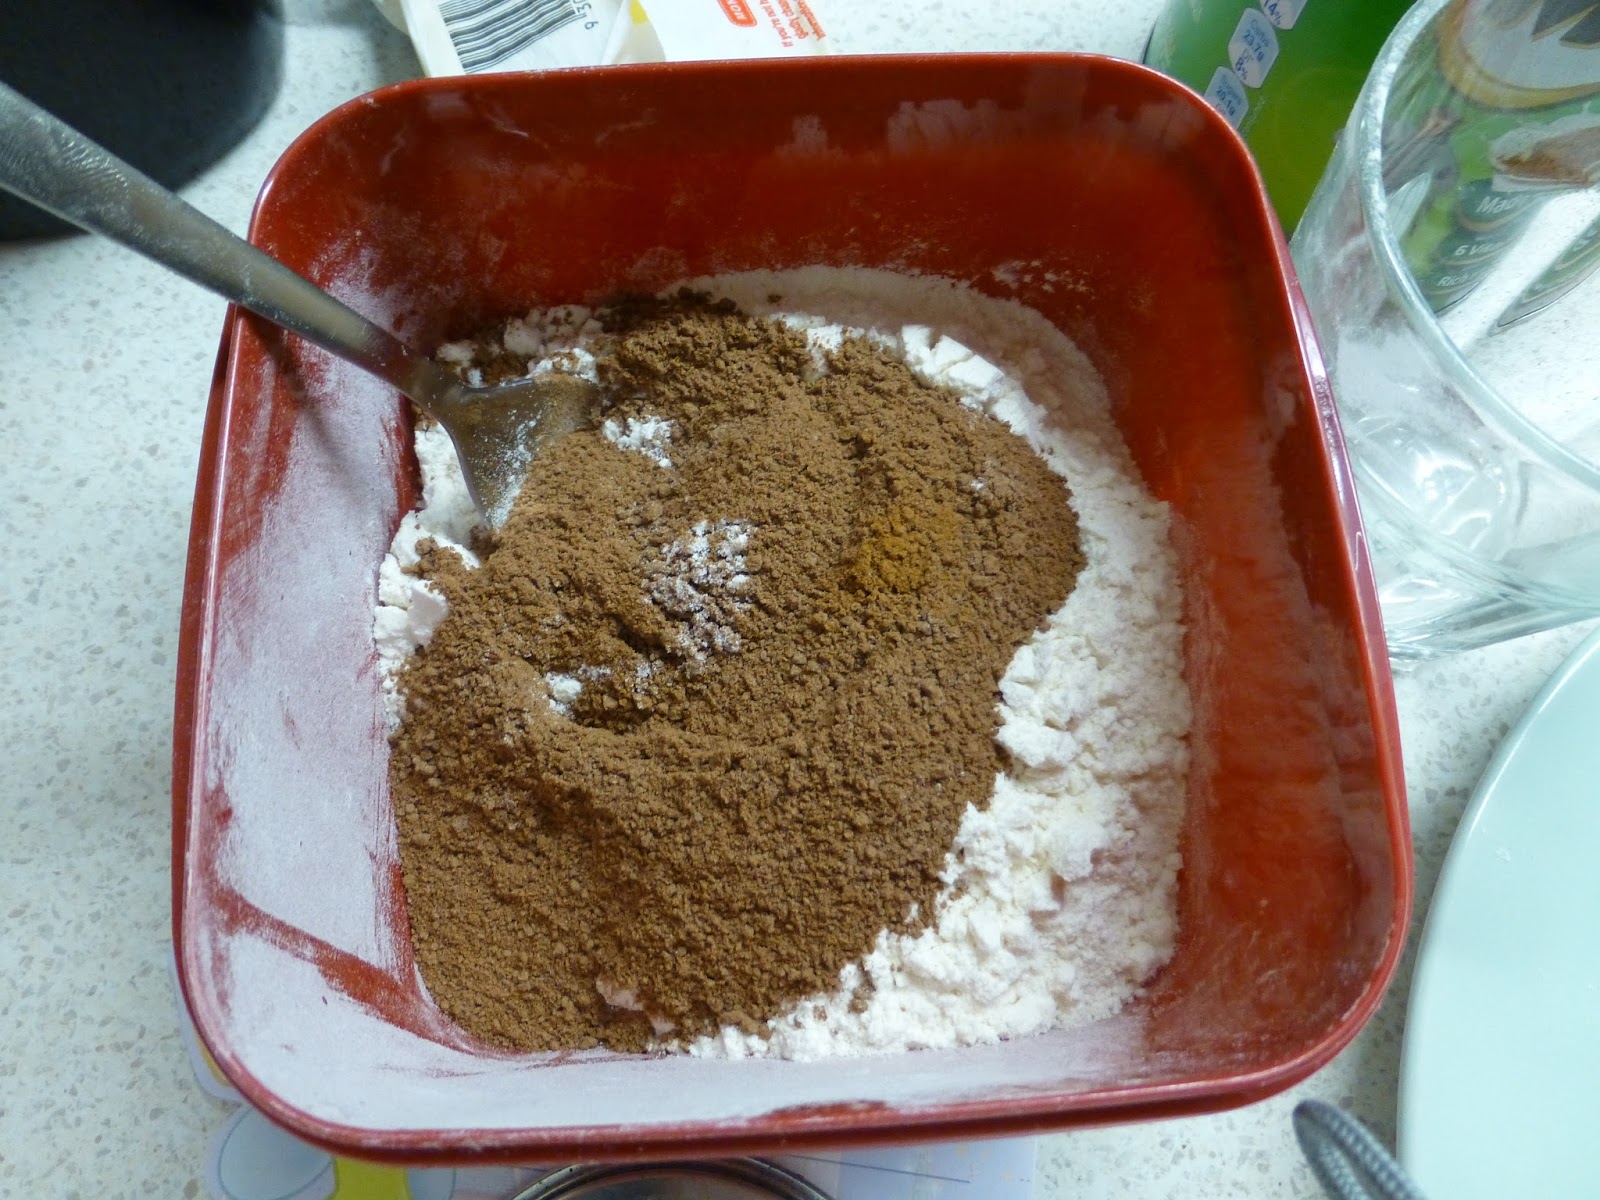
| Mixed all the dry ingredients together: self-raising flour, milo powder, cinnamon & bit of cayenne pepper. |
 |
| Decided I didn't really need to add sugar since there's sugar in the milo powder. Tried to cream this butter with the milo powder. It didn't work as well as creaming butter with sugar. |
 |
| Slowly added in the dry ingredients to all the wet ingredients (also added the same wet ingredients to the butter and milo powder combination). The same fluffiness texture thing occurred, so I think it's just a result of the mixture of ingredients. |
 |
| Added in chocolate chunks and walnuts. |
 |
| Sample cookie! Bit burnt, but tasted fine. Less sugary than the choco chunk cookie, but I prefer it that way. |
 |
| Rolled the rest of the dough into balls. |
It was about midnight by this point and I was super tired so I packaged the dough balls and called it a day.
NEXT DAY "BAKING":
 |
| Ready to "bake"! |
 |
| First batch! |
|
 |
About halfway done. Look at how fluffy they are!
Mmm they look so good. I can't wait to eat one! |
 |
| Sadly had to flip them over to "brown" the top a bit so they're less poofy. |
 |
| Still lookin' fine. |
 |
Next batch!
These cooked faster than the chocolate ones simply due to the lack of chocolate. |
 |
| Flipping. I like how they turn out when I don't fork them down in the pot first. |
 |
Repeated until all the dough balls were "baked"!
I love freshly baked goods!
My goal when I have my own place is to always have a batch of fresh goods for guests, even if no one visits me. My dog can just reap all the benefits if they're canine-friendly treats I guess. |
In between cookie preparation and cooking the rest of the cookies, I made a mug cake with some of the leftover dry ingredients for the malted choco choco chunk walnut cookies!
 |
| All the ingredients (leftover dry ingredients, applesauce, pb, almond milk, cinnamon & cayenne pepper, the last of which I did not use). |
 |
| Basically just mixed all the ingredients together. |
 |
| Microwaved the cup for about a minute. |
 |
| Added some Greek yogurt, walnuts & milo powder before consumption. |


No comments :
Post a Comment